Morning Range v2
Morning Range Indicator
Start here to add the indicator, understand what it does, and use the signals the right way.
How To Add the Indicator
Step 1 — Get Your TradingView Username
1
Go to TradingView.com and sign in (or create a free account).
2
Click your profile icon in the top-right corner — your username is shown below your display name.
3
Copy that username exactly — you'll need it to receive indicator access.
Step 2 — Add the Indicator to Your Chart
1
Open TradingView and go to any chart. Click Indicators in the top toolbar.
2
Click Invite-Only Scripts in the left sidebar — the Morning Range Indicator will appear there once access is granted.
3
Click the indicator name to add it to your chart. It will auto-draw pre-market levels and signals.
What It Does
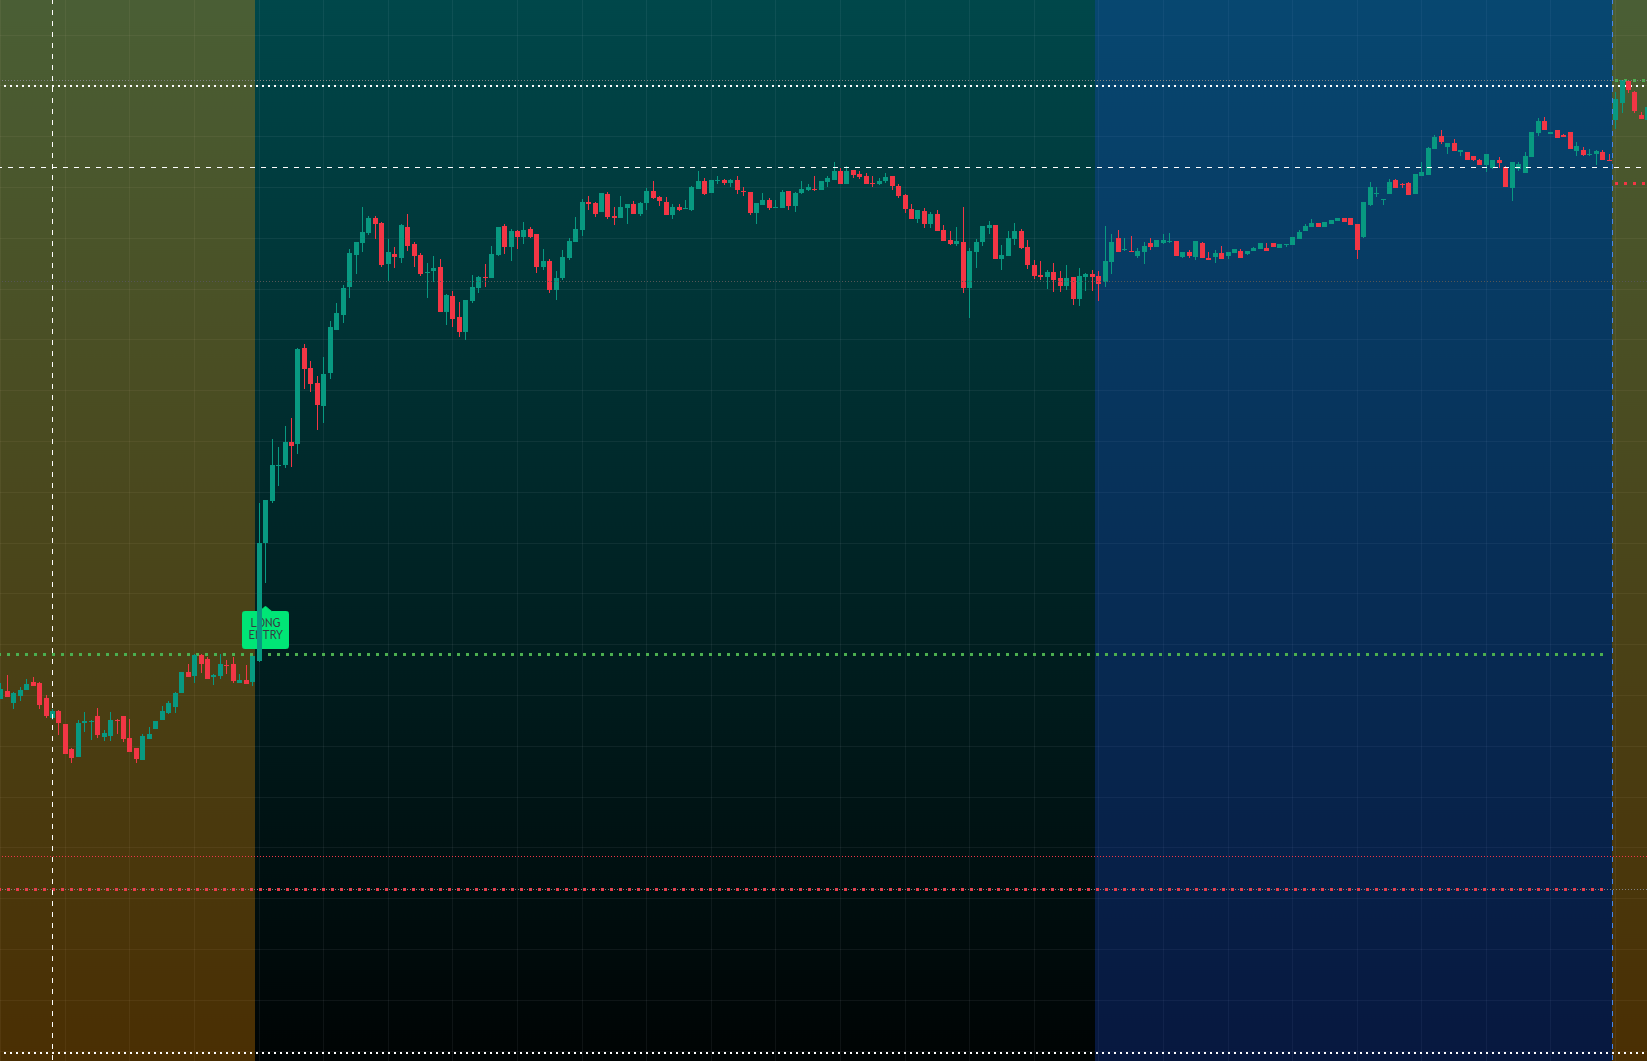
- ✓ Draws the opening range, pre-market levels, weekly levels, and daily pivot automatically.
- ✓ Gives BREAK / RETEST and SUP BUY / RES SELL signals around those levels.
- ✓ Uses confirmation and cooldown logic so the chart stays cleaner.
- ✓ Supports alerts so setups can reach your phone or desktop.
100% free. Just add to TradingView.
This tool is a decision framework, not a prediction engine. Signals can fail in choppy, low-liquidity, or headline-driven sessions.
How To Trade v2
1Trend day: wait for the OR break and retest, then use PM High or PM Low as the first target area.
2Range day: use rejection logic at OR, PM, or weekly highs/lows instead of forcing breakouts.
3Risk first: skip the open noise, avoid unclear level interaction, and do not force low-quality setups.
Examples

Also Included
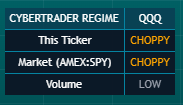
Regime Dashboard is included with the Morning Range Indicator bundle (also accessible with ELITE / HUB subscription). Use it to quickly read ticker state, market state, and HI/LOW volume before entries.
Also free from CYBERTRADERS
FREE CyberTrader AI Lite — Add to TradingView in 60 seconds →